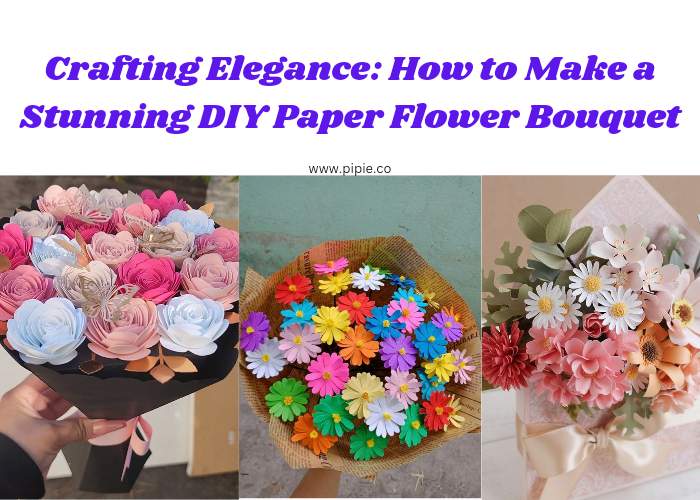
Flowers have a timeless appeal, symbolizing beauty and charm. Crafting your own DIY paper flower bouquet is a wonderful way to bring everlasting beauty into your home or gift it to someone special. Whether you’re a seasoned crafter or just beginning, creating a bouquet of paper flowers is a fulfilling and creative endeavor.
Materials Needed:
To start creating your DIY paper flower bouquet, gather these materials:
Colored craft papers (variety of shades)
Floral wire or wooden skewers
Scissors
Hot glue gun and glue sticks
Green floral tape
Ribbon or decorative wrapping paper (optional)
Steps to Create a Paper Flower Bouquet:
Step 1: Choose Flower Designs
Select the types of flowers you want to include in your bouquet. Roses, daisies, peonies, or a mix of various blooms are popular choices. You can find templates or create your own designs based on real flowers.
Step 2: Cut Out Flower Patterns
Using the colored craft papers, trace and cut out the flower patterns. Make petals, leaves, and any additional elements needed for each flower type. Vary the sizes and shapes to add depth and realism.
Step 3: Assemble the Flowers
Start assembling the flowers by layering the petals. Begin with the larger petals as the base and gradually add smaller petals toward the center. Use a dab of hot glue to secure each layer. Create a center for the flower by rolling or folding small pieces of paper and attaching them in the middle.
Step 4: Attach Stems
Once the flowers are assembled, attach floral wire or wooden skewers to the back of each flower using hot glue. Cover the stems with green floral tape for a realistic appearance.
Step 5: Arrange the Bouquet
Gather your completed flowers and arrange them into a bouquet. Experiment with different sizes and colors, and position them in a way that creates a visually appealing arrangement. Use floral tape to bind the stems together securely.
Step 6: Add Finishing Touches
Wrap the stems of the bouquet with ribbon or decorative paper for a polished look. Trim the stems to your desired length, ensuring they are even. Make any final adjustments to the flower arrangement for a balanced and beautiful bouquet.
Tips and Tricks:
- Mix and match different paper colors to create unique and vibrant flowers.
- Consider using textured paper or adding details like painted edges to enhance the realism of the flowers.
- Use a variety of flower shapes and sizes to add visual interest to your bouquet.
- Don’t hesitate to experiment with different flower designs or incorporate your own creative ideas.
Conclusion:
Crafting a DIY paper flower bouquet is a delightful way to showcase your creativity while adding a touch of elegance to any space. These handmade blooms offer a long-lasting beauty that can be cherished for years to come. Whether as a gift for a loved one or as a stunning centerpiece in your home, a paper flower bouquet reflects the time, effort, and care put into its creation. So, gather your materials, unleash your imagination, and craft your own exquisite paper flower bouquet today!


